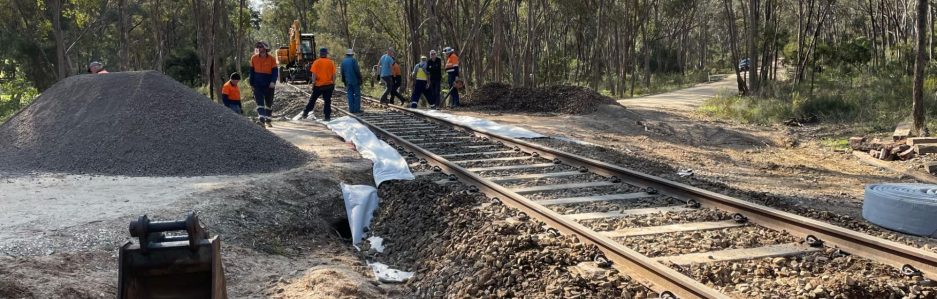
Today saw 56 concrete sleepers installed in curve 9 (near Sawmill Road). This is yet another first for the team, as this is the first time we’ve installed concrete sleepers under 60lb rail.
The condition of the timber was not fantastic around this curve, so we chose to install the new sleepers every third to ensure gauge holding was strong.

Earlier this week 100 sleepers were distributed along the curve. Although only 56 were needed, a loaded well wagon holds 100.

New pads, where needed were installed onto the concrete sleepers before we placed in the track.
As we are experiencing some settling of the sleepers installed in this section, we chose to do a ‘running lift’ to lift the whole section 50mm before installing the new sleepers.
This was two fold, to ensure we didn’t disturb the road base when installing the new sleepers and to make the process much easier.

We cheated some what in how we achieved the running lift, by unspiking every third sleeper (the ones to be removed), lifted the track up using the tamping head, installing a 50mm block of wood and then tamped the remaining sleepers to hold the new level.
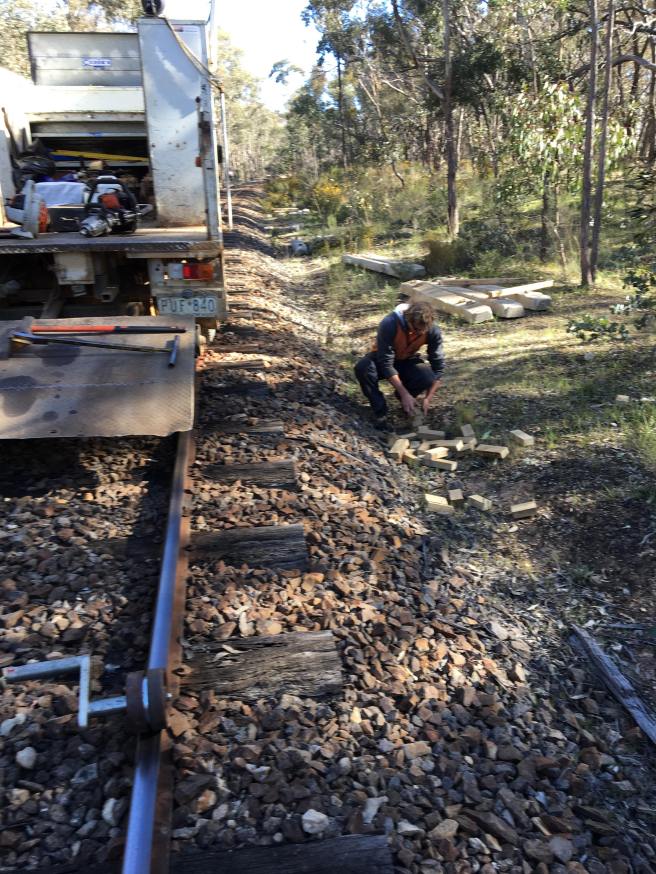
We used about 20 blocks to really speed up the process, but next time we’ll remember to bring a bucket to lug them around in, as here Will tries to pick up and juggle as many blocks as possible.

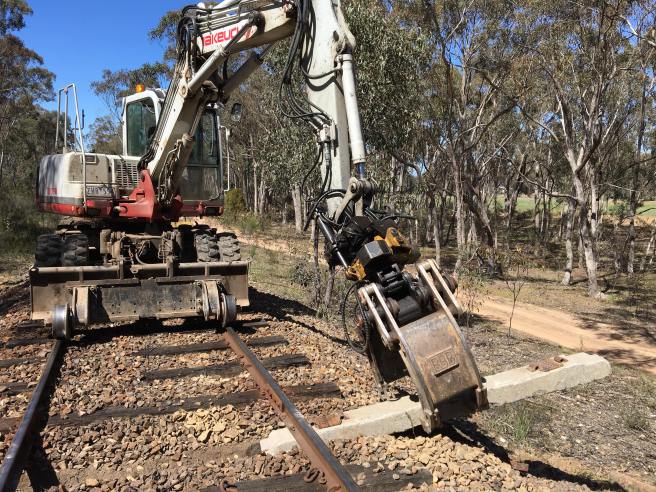
The lifting, blocking and tamping process made it much easier and quicker to remove the old sleepers and allowed for less scarifying to install the new concretes. The pic above shows the old coming out while the scarifier follows behind cleaning out the hole.
This made for very quick installation of the new sleepers.
But today’s major difference was all during the clipping up process.
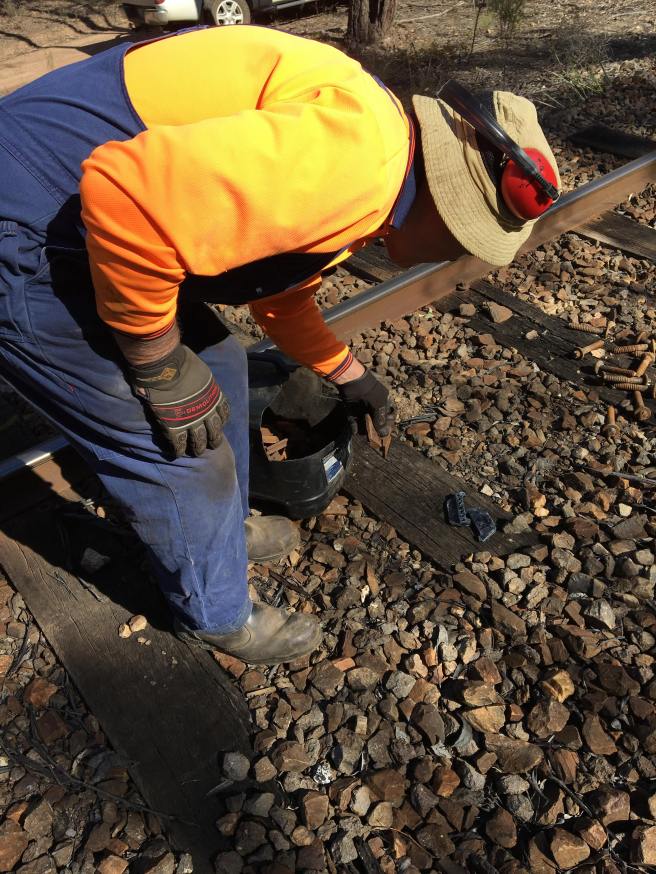
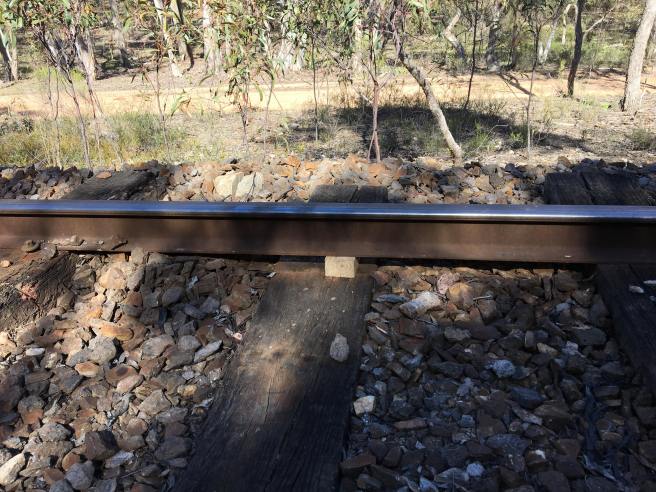
Here Clive drops out 2 standard 17.5mm biscuits and 2 manufactured biscuits. It’s the manufactured biscuits that are important for securing the 60lb rail to the concrete sleepers.
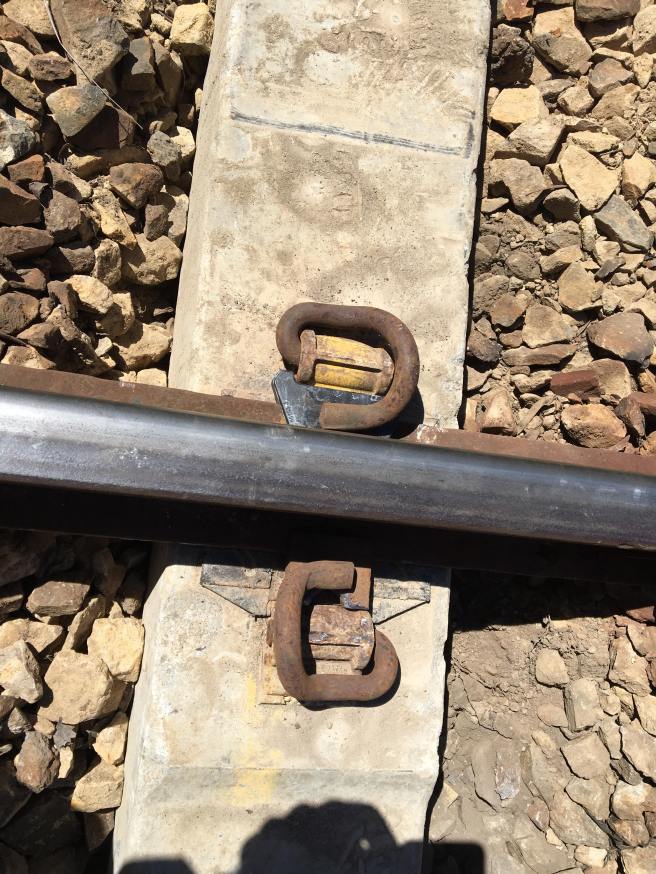
Here a clipped up and finished sleeper. As the inner edge of rail foot is in an almost identical spot to 80lb rail, we can use the standard plastic biscuit there, but the outside edge is approximately 16mm different to 80lb (60lb is the narrower) so a much larger biscuit is needed to fill the gap.
We found, by complete coincidence, that some of the old steel sleeper lugs, used in the bolt up style fastenings, have the perfect profile to complete the job and when they are cut exactly in half, two of the right size biscuits are produced. – We’ll pop up a close up picture of one tomorrow.

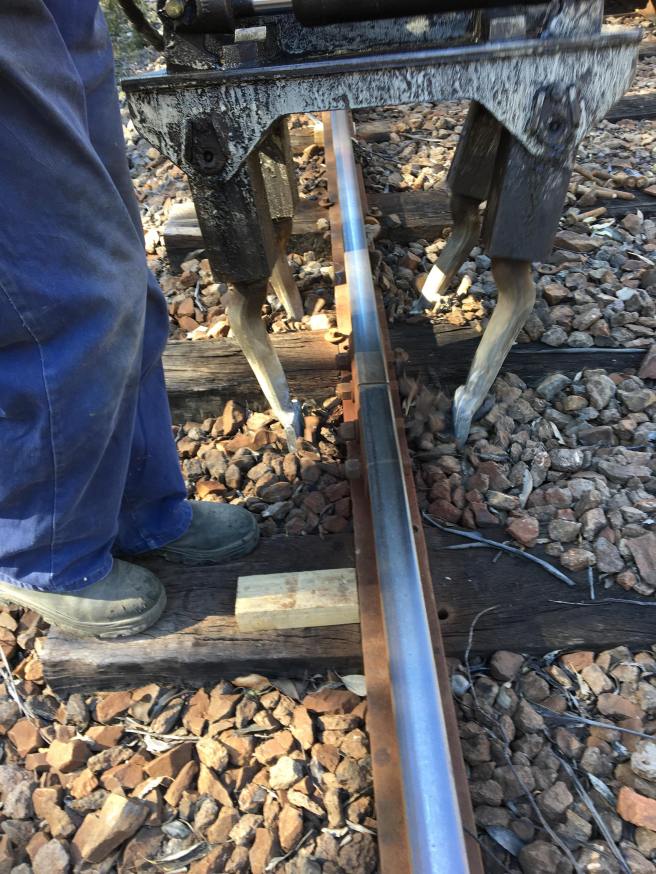
We weren’t sure how they’d go during the installation process as they don’t have anything to stop sideways movement while installing the clip, unlike the plastic biscuits, but that proved to be a false concern as they gave no trouble at all! Once clipped up movement isn’t possible due to the spring loaded e-clip holding down on it.

The pic above shows the easier method of installation (after much trying, debating and discussion).
Use the pan setter (blue tool) to lift and adjust the sleeper position until the plastic inner biscuit is in place. Then install the outer manufactured biscuit, tapping home if needed to ensure a nice snug fit and finally install e-clips. Then of course repeat for the other rail!
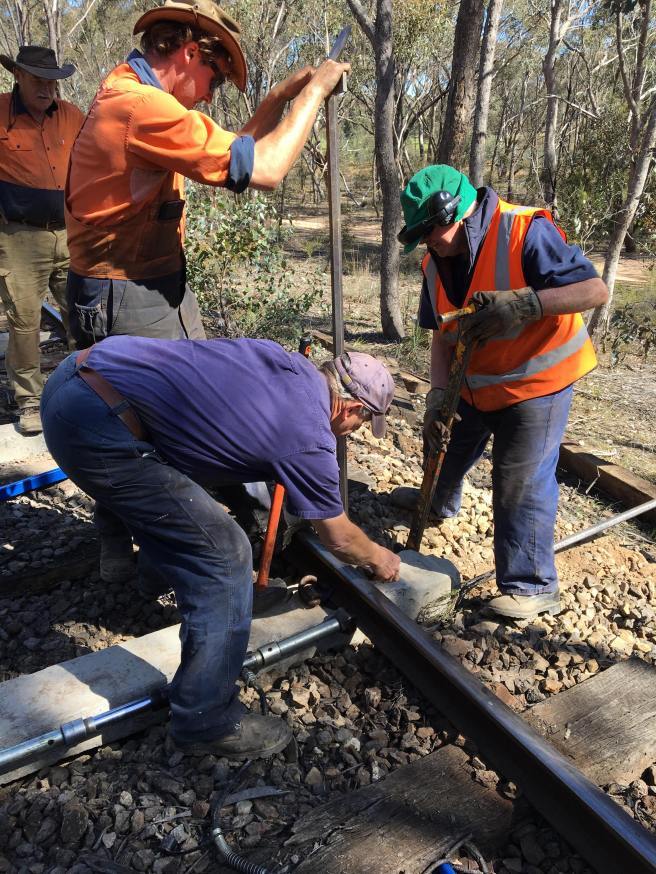
By lunch time we’d got the pattern very well down pat and we were easily clipping up a sleeper in less than 2 minutes! Not bad going for a first time and much quicker than drilling and spiking timber sleepers.


The hard working gang during a coffee break, as always discussions solved all the problems of the world… But no-one kept minutes so well have to discuss it all again next week!
The social aspect of the gang is a large part of the appeal we think and we’re always happy to have new people, so don’t be scared off because you think it’s all about trains and hard work.

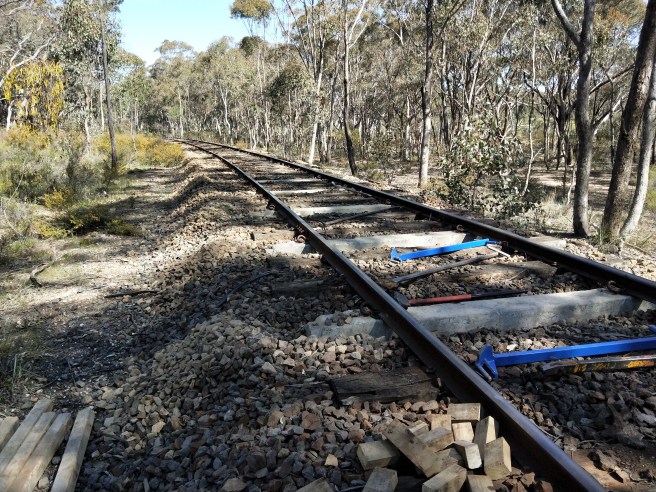
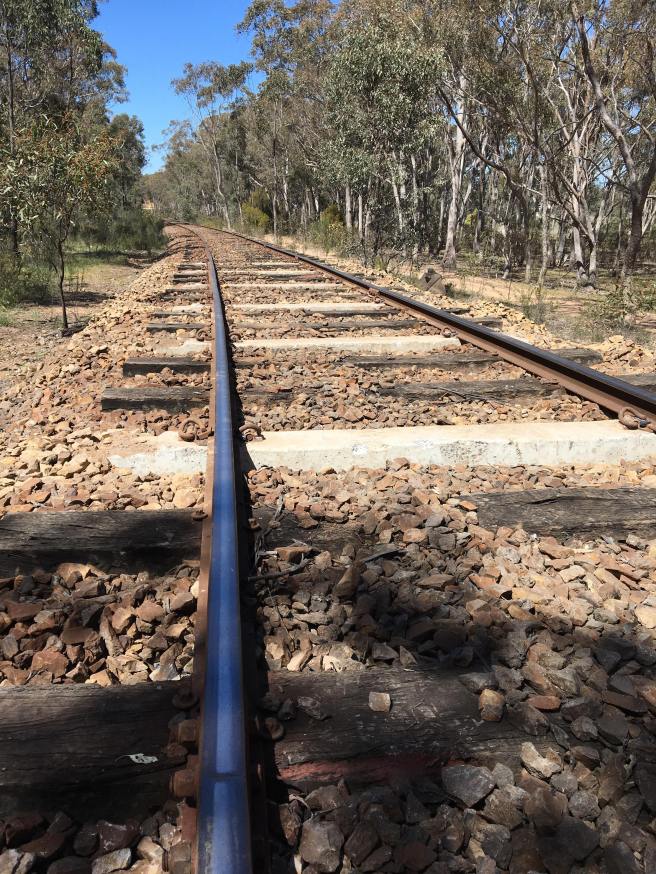
The 1 in 3 concrete sleepers are very obvious and will be until they get some dirt on them, but they also look very impressive. They should ensure this section of track will be strong and safe for many, many years.

After a packup we scrapped up what rock we could from the shoulders, although the section in the picture above has sufficient ballast for tamping and finishing, the other end of the curve is very light on for rock, so a wagon load will be distributed in the morning before we tamp it up.
Requiring ballast is a trade off of lifting the 50mm, which although needed will quickly deplete our small ballast reserves. There’s always a catch.
So feel free to join us tomorrow, 8am from Maldon or 8.45am on site.
